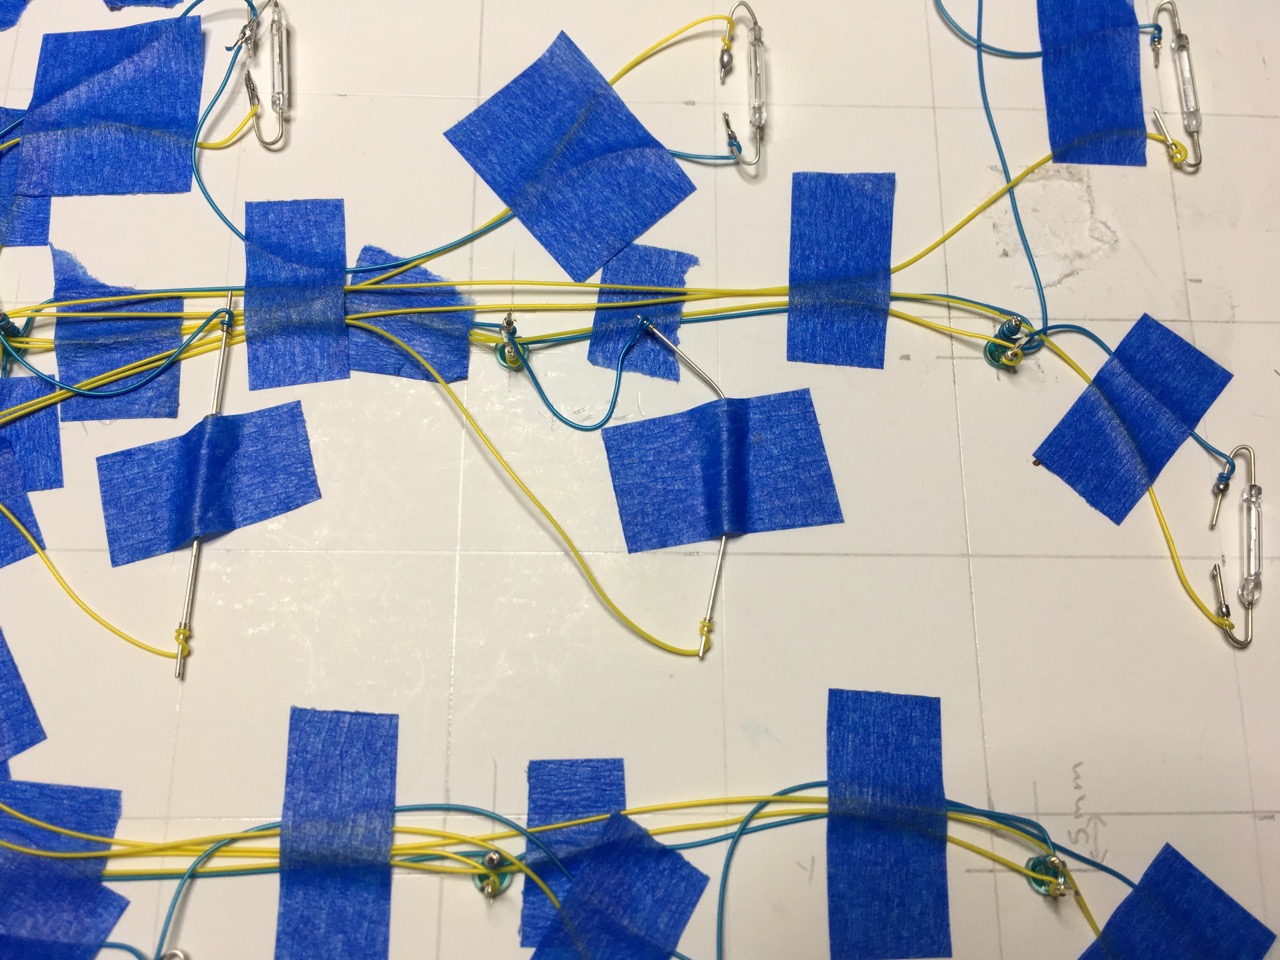
Small scale e-Board prototype
<<Previous | TOC | Next>>
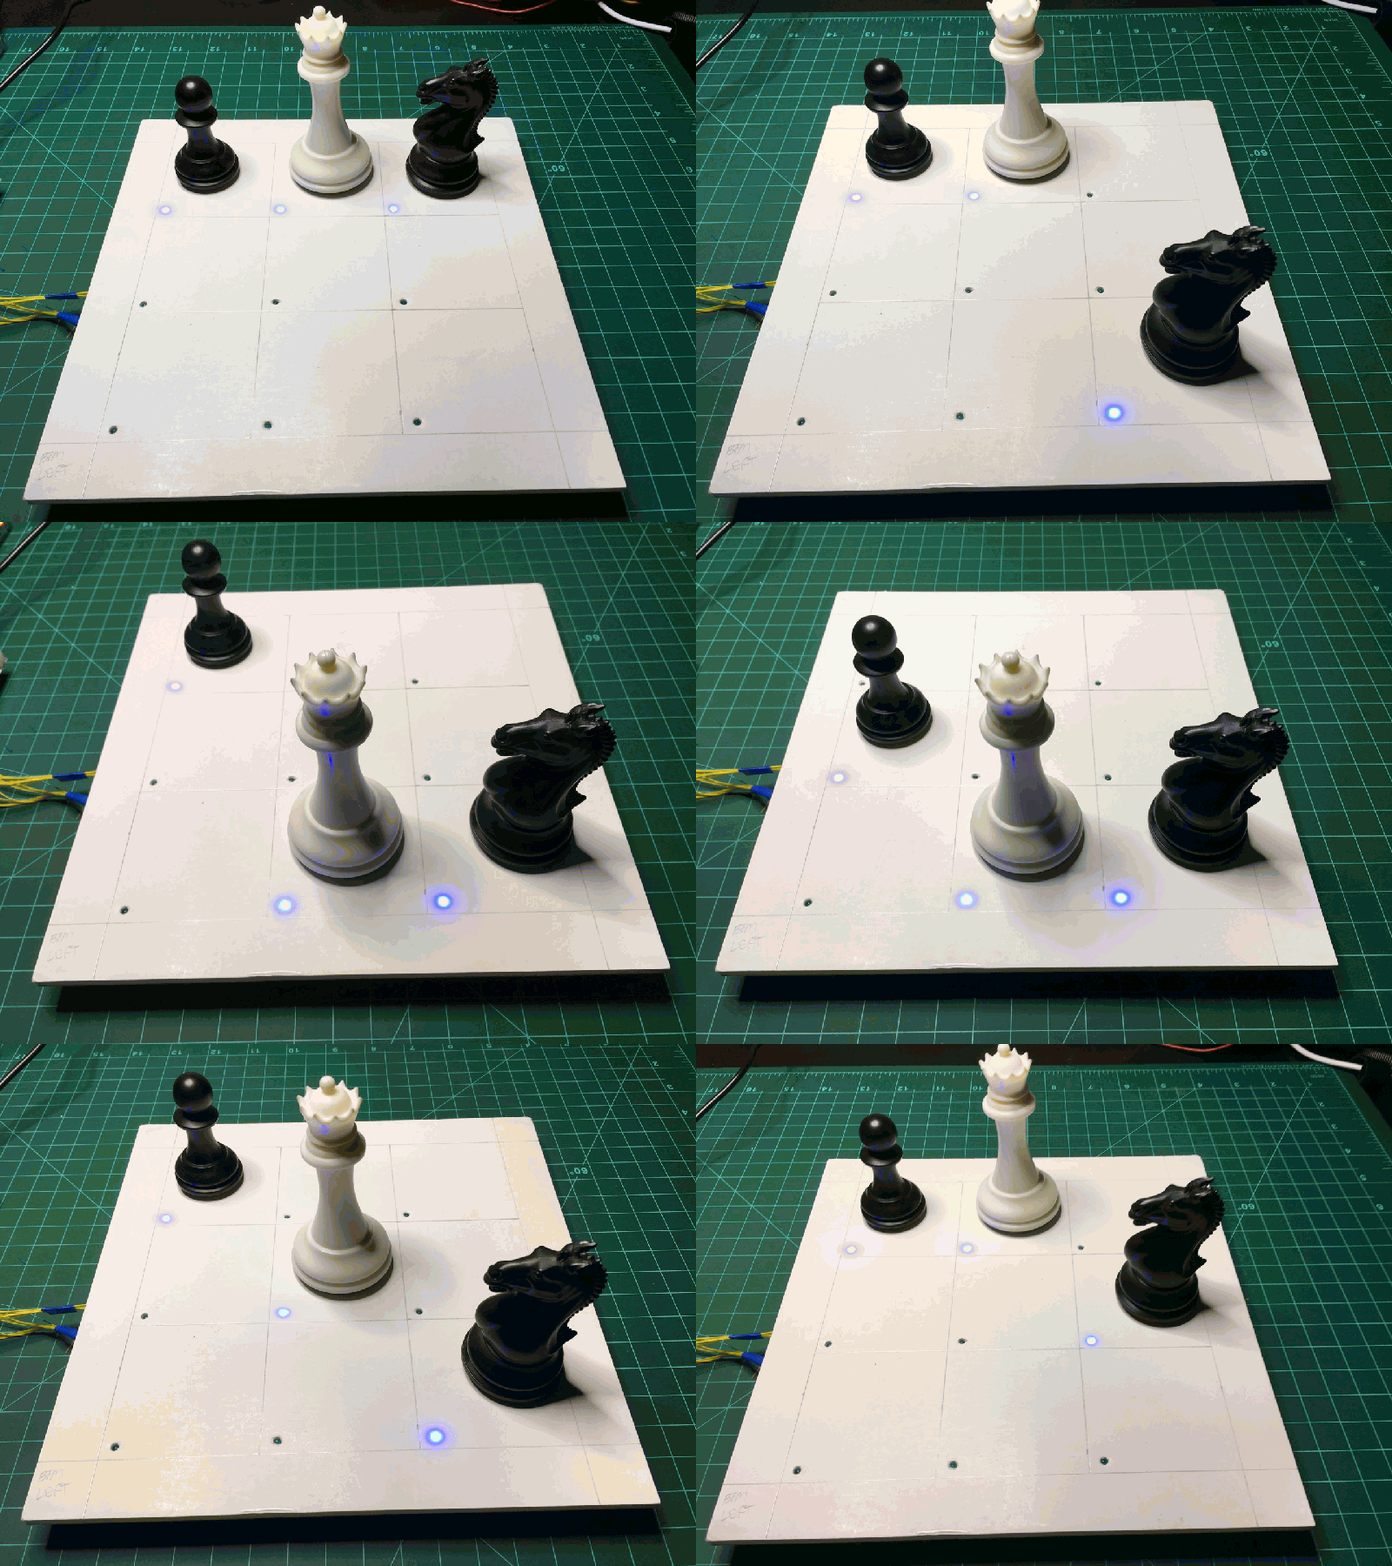
ChessLR progress report 5. My first prototype chessboard works like a charm. I wanted small scale test to get LEDs and reed switches setup on a board, then be able to move chess pieces around to see how well the switches would work. The switches have no trouble sensing the pieces, and it's quite magical being able to move pieces without having to press any buttons, like chessboard computers of old.
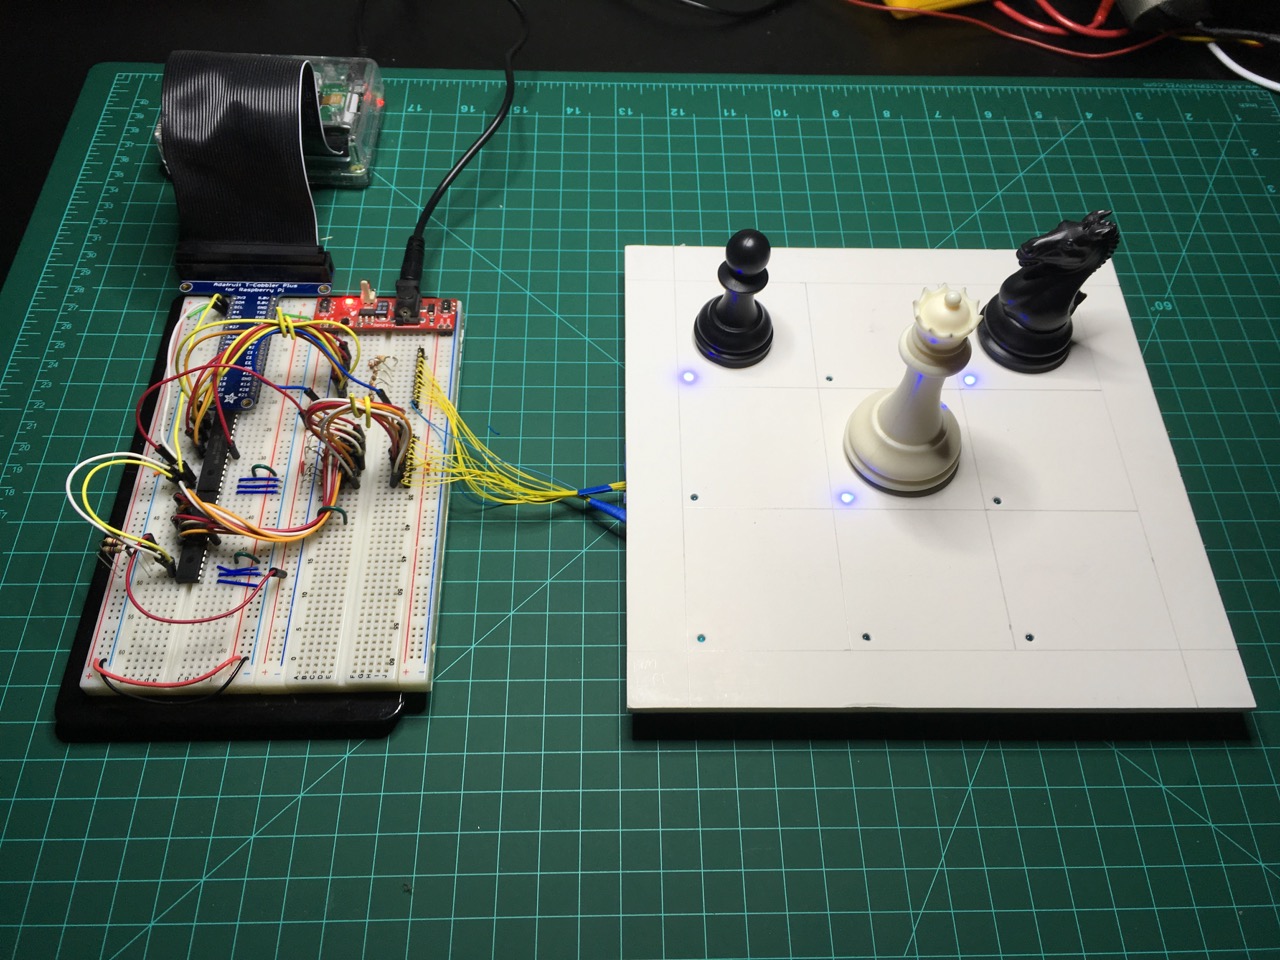
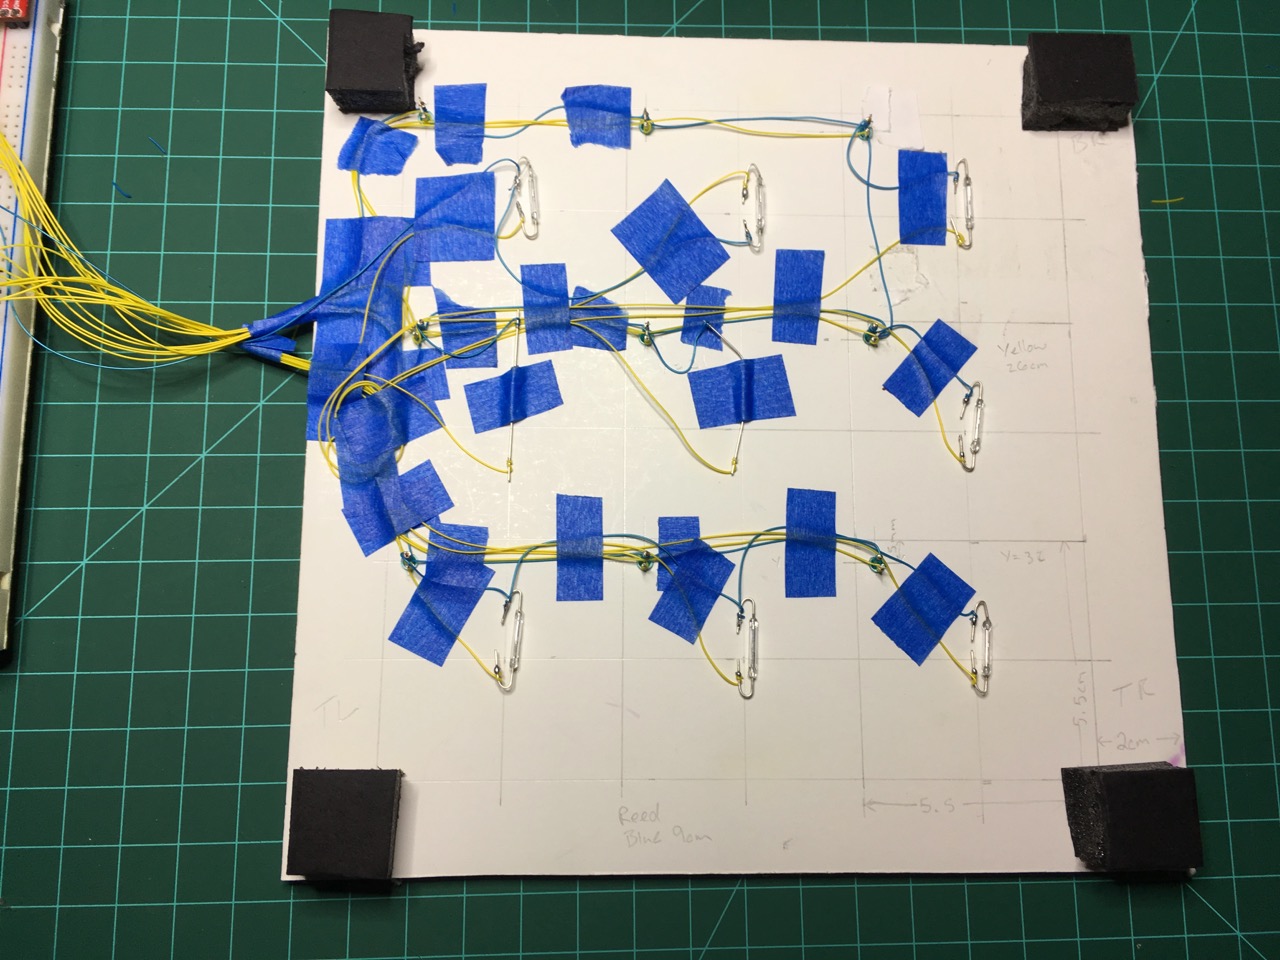
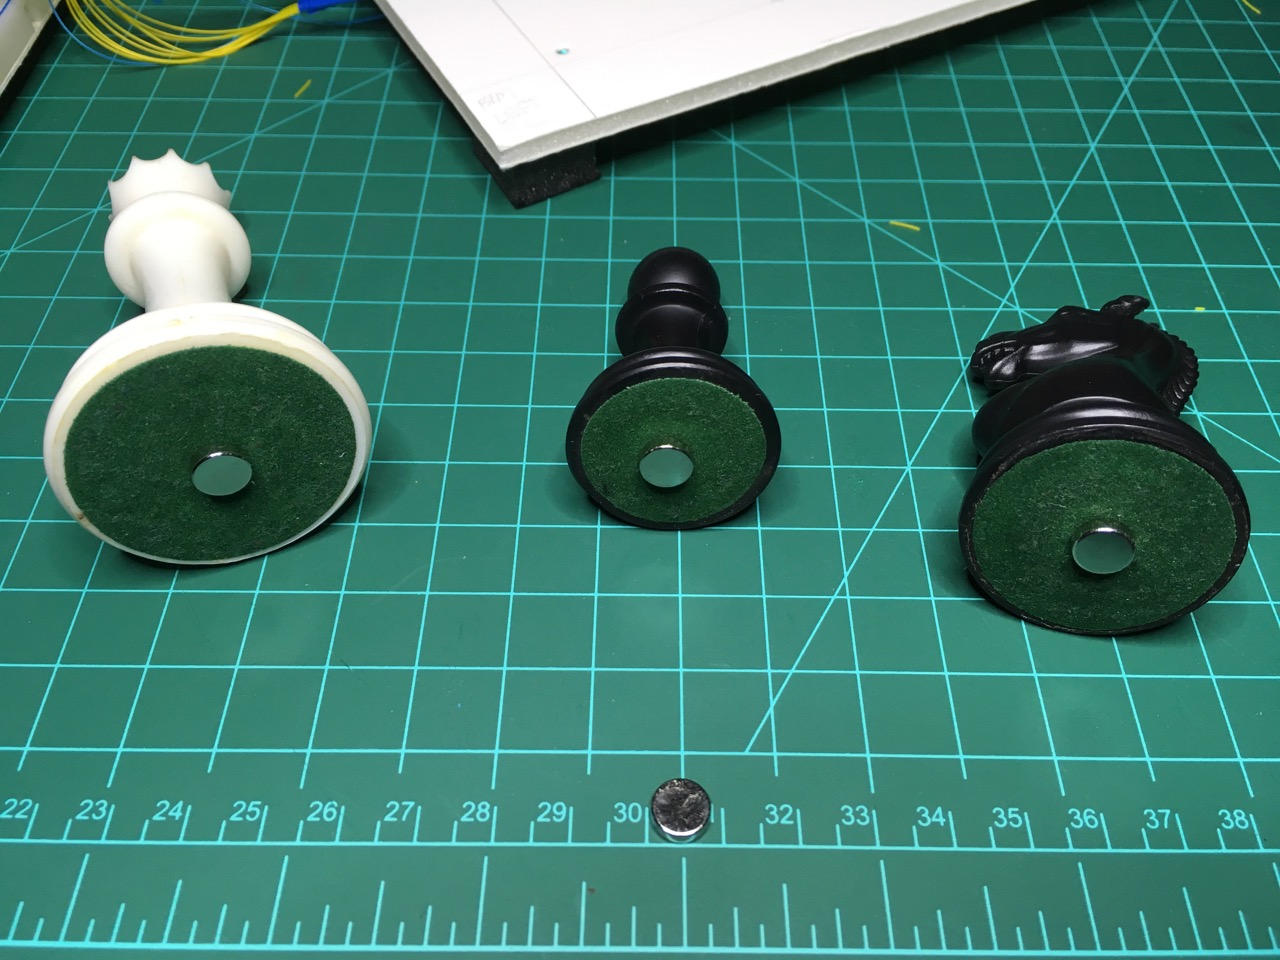
The board is 3x3 squares and made out of a stiff foam board. There are nine 3mm blue LEDs that are located in the bottom left of each square. Reed switches are on the underside of of the board. Magnets are affixed to the underside of the pieces.
As you move the pieces, the LEDs will turn on when it senses a piece over the square. While not perfect, it works really well. Once I position the reed switches better, the dead zone of the switch will not effect where you place the piece as much. As it is, some of the squares will not sense the piece when it is a little off center. As for two switches sensing a piece, that shouldn't be a problem as once the pieces is closer to the middle of the next square, the other one no longer senses it. So you will sometimes get two switches seeing a piece as it moves between two squares.
Showing pieces moving and LEDs follow the pieces
Reed switches on the underside of the board
Pieces with magnets
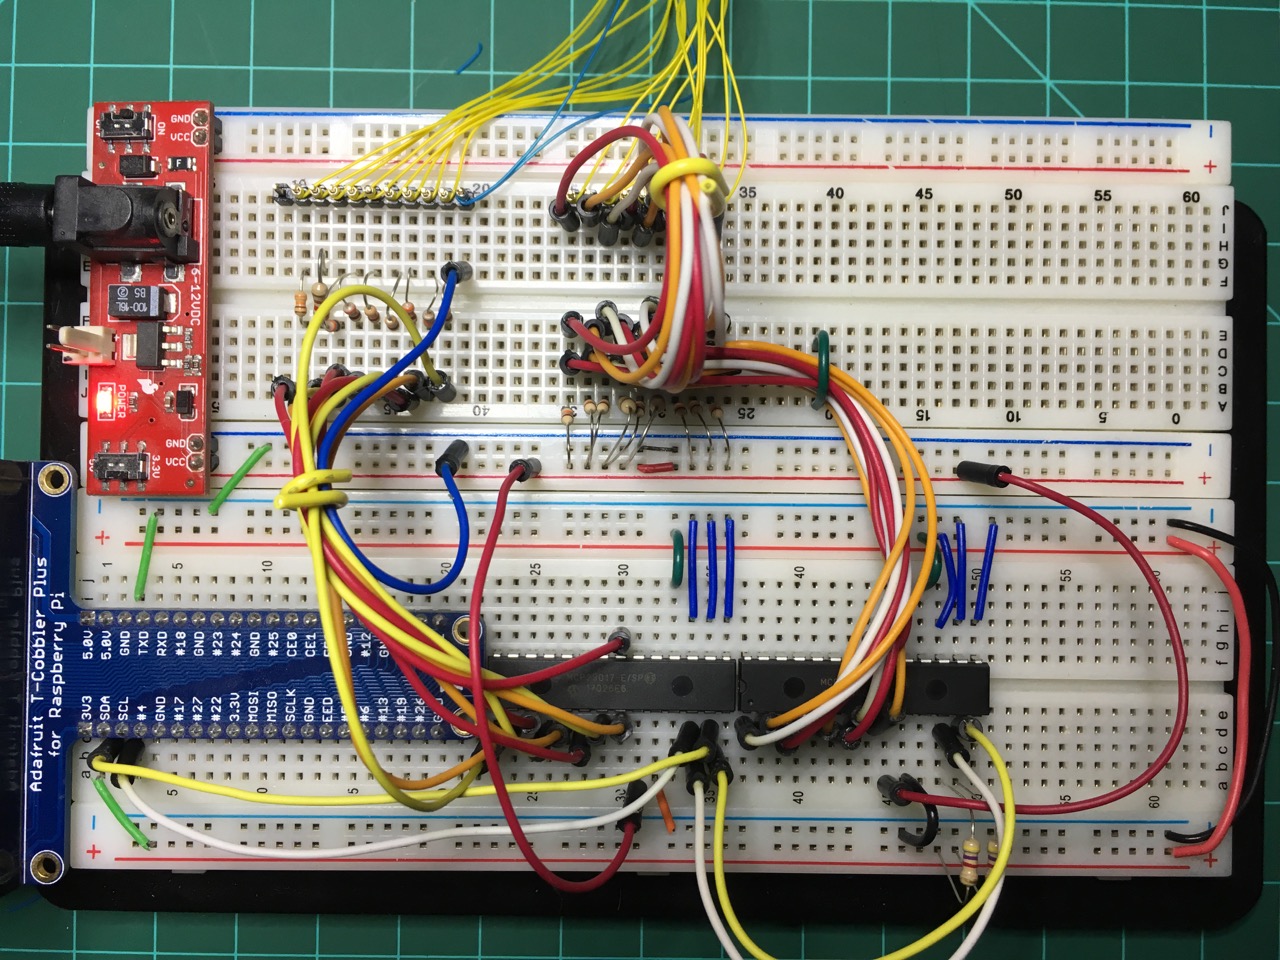
Breadboard
On the breadboard (sorry for all the jumpers) you will find the Pi T-Cobbler, a GPIO Breakout for the RPi. It allows you to plug it into a breadboard and connect to the pins via jumpers. To the right of that we have 2 MCP23017 i2c i/o port expanders. They allow me expand the number of pins the RPi can attach to. You can have up to 8 of these chips connected, for a total of 128 pins! All of which I will be making use of in the final board. 64 LEDs and 64 reed switches. Because we have more then one i2c device connected, it's recommended that you connect the two i2c pins to Vcc (+3.3V in my case) via a couple 4.7K ohm resistors. You only need 2 for as many i2c devices as you want. I have the 23017's setup to be on address 0x20 and 0x24. One is for output and controlling the LEDs and the other is for input and reads from the reed switches.
Note: Use real pull-up resistors instead of relying on the internal ones. I was using the internal ones and eventually the chip started acting up.
Pull-ups are 10K, and LEDs have 330ohm resistors. The LEDs and reeds are connected via the yellow wrapped wire at the top. I used a couple headers so I can disconnect the chessboard from the breadboard for transport. Finally, I also have a power supply stick so all the power isn't coming from the RPi.
The breadboard
Reed Switches
Closer look at the reed switches
While these things are cool as can be, they are so finicky! I don't know if it is because I got a bad or counterfeit batch, but over half of them stick closed after you pass a magnet over them. They are also quite fragile because the contacts are encased in glass.
Positioning of the switches is very important. The center of the switch is a dead zone, where it doesn't sense anything. It seems the leads that do most of the sensing. I'm experimenting with a few positions, and so far my favorite is one straight lead, and one bent. Even better would be to have the reed straight up and down, but that would require a much thicker board. I'm going for as thin as possible. So the switches need to remain horizontal. I started out wire wrapping and soldering the wire to the leads, but when the switches kept failing, I just wire wrapped to make it easier to swap them out. It's not a super solid connection, but it seems to work well enough for this test.
Software
I had been writing some simple one-off programs to test individual components. This time I needed something a little more integrated that would give me a feel for how well the switches would track the pieces, and I wanted it a little more visual. So I decided to light the LED of the square when a piece was over it.
The main program is in the examples.ThreeByThree Java class. It also utilizes ChessLEDController.java and ChessReedController.java.
There are 3 parts to the program. First part is initializing the controllers. The GPIO controller is part of PI4J, and the LED and Reed controllers are mine. They allow me to simplify controlling and reading from 16 different pins (9 LEDs, 9 reed switches). Reading switches is handled via a listener, and is called when the chip senses a change to one of the inputs. The handleGpioPinDigitalStateChangeEvent method is called when a switch changes state, which allows me to not have to poll the switches all the time.
public ThreeByThree() throws Exception {
    ledController = new ChessLEDController(gpio,I2CBus.BUS_1);
    reedController = new ChessReedController(gpio,I2CBus.BUS_1);
    reedController.addListener(new GpioPinListenerDigital() {
        public void handleGpioPinDigitalStateChangeEvent(GpioPinDigitalStateChangeEvent event) {
            boolean state = event.getState() == PinState.HIGH ? false:true;
            int ledIndex = reedController.findPinIndex(event.getPin().getPin());
            ledController.led(ledIndex,state);

            System.out.println("application gpio pin state change: " + event.getPin() + " = " + event.getState() + " led="+ledIndex);
        }
    });
}
Once the controllers are initialized, I do a small startup sequence that lets me see that all the LEDs are functioning by lighting each one up one at a time. It will then check what squares have a piece on them, and turn on the LED for those squares.
In the final product the startup sequence can be anything fancy I can think up, since I will essentially have an 8x8 matrix.
public void startup() {
    try {
        for(int i = 0; i < 9; ++i) {
            ledController.led(i,true);
            Thread.sleep(100);
            ledController.led(i,false);
        }

        for(int i=0; i<9; ++i) {
            ledController.led(i,reedController.isSet(i));
        }

    } catch(InterruptedException e) {
        //do nothing
    }
}
Going Forward
My next step is to spend a little time positioning reed switchs, so pieces are better sensed. On the software side, I'm planning to start some logic that will be able to track where a piece is moving from and too.
I have also started working on a generic chessboard class can be used to validate moves, generate FEN notation, and keep track of a board position as you enter moves. This will be needed as the chess engines don't keep track of the board position, or validate if a move is legal or not. Or at least Stockfish doesn't.
